Feeds:
Posts
Comments

Blood Orange Granita

I am a total sucker for blood orange anything.  One of my favorite flavors ever.  And with snow and cold outside, the sight of that fruit just makes me think of warmer times.  It brings a little Miami to my winter kitchen.  I know, it’s not seasonal here (there’s…um…no citrus season here in NJ that I know of…) and it’s not local, but it’s delicious and I wanted it and the market had it and so here you go.  Blood orange granita.  Crank up the heat and pretend it’s the Caribbean.  And yes, it’s that bright pink all on its own.  Eat the pink snow!

1782099_10151813442936511_1287218126_nBlood Orange Granita
by CSAgourmet
Serves 10-12 nicely

4-5 medium blood oranges, enough to yield about 1/2 c. juice
4 c. water
scant 3/4 c. granulated sugar
pinch salt

Zest all oranges into a 2 c measuring cup.  Cut oranges in half and juice them into the measuring cup.  Then, toss the used halves into a saucepan with the water, sugar, and salt.  Heat the water mixture until the sugar has dissolved, holding it just under the boil for about 2-3 minutes (CAREFULLY spoon out a bit and cool then taste and adjust sugar accordingly).  The orange halves will lend some flavor to the mixture.  Turn off the heat.  Carefully strain out the orange pieces and discard.  They’ve done their duty.  Let the water mixture cool completely (don’t skip the cooling unless you want to crack your glass dish).  While it cools, chill a 13×9 glass baking dish in the freezer.  When the water mixture is cool, add the juice and zest and stir to combine.  Pour the mixture into the glass baking dish and place in the freezer, uncovered.  After 30 minutes, use a fork to scrape the ice crystals.  Repeat every 30 minutes or so 3 or 4 more times.  This will form the characteristic crystals of granita.  When only crystals are left (no liquid), cover and let freeze fully.  When ready to eat, spoon crystals into dishes.  They’ll be fluffy and yummy. Enjoy!

dish

Like my 80’s serveware? Choose wisely, kids. Dishes are forever.

Whew!  That’s some name for a recipe.

Let’s just get this said right off the top.  Anything with blackberries is work.  Blackberry seeds are hard and, in my opinion, not chewable and ruin the mouthfeel of a dish.  So, you’re going to to have to strain them out.  And since it’s a thicker syrupy jammy thing, elbow grease will be needed.

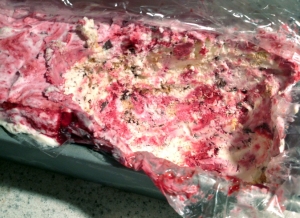
Having said that, I would not put you through it if the final product was not worth it.  This ice cream is fanfreakingtastic.  And it’s no churn.  It doesn’t taste like a churned ice cream — it’s like a rich, frozen creamy whipped cream somethingorothersodelicious.  Really, you can’t compare it to “regular” ice cream.  It’s it’s own amazing thing.

berriesThe base recipe is from Woman’s Day August 2013 issue (I dare you to resist buying the magazine once you look at the cover).  I’d never bought a Woman’s Day issue in my life, but that cover got me at the checkout stand.  The original recipe is Black Forest and uses cherries.  But blackberries were in season here and we had just picked some at Terhune Orchards, so there you go.  And, because we’re fans of the Kashi Blackberry Graham granola bars and I LOVE me some cakey business in my ice cream, I added graham crackers to the mix.  I think the base would be great with just about any fruit, so experiment with the flavors you love.

Let’s get to it.


syrupBlackberry Graham Chocolate Chunk No Churn Ice Cream
adapted from Woman’s Day by csagourmet

14 oz fresh blackberries
1/3 cup sugar
2 1/2 Tbsp water
2 cups very cold heavy cream
1 14-oz can sweetened condensed milk
1 tsp pure vanilla extract
2 or 3 graham crackers (full sheets), crumbled but not pulverized
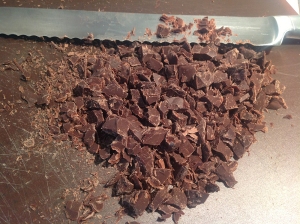
5 oz semisweet chocolate chunks (I buy Valhrona or Callebaut in a bulk bar and chop it myself)

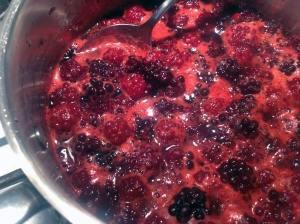
chunksPlace blackberries, sugar, and water in a saucepan.  Bring to a boil, then reduce heat and simmer (stirring frequently) until blackberries break down and it thickens into a thick syrup, almost jammy (took about 25 minutes for me, but may vary for you). Remove from heat and let cool until cool enough to touch.  Push the blackberry syrup with a spoon through a sieve to strain out the seeds and any remaining solids.

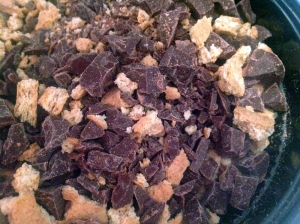
choc-grahamIn an electric mixer with the whisk attachment, beat the cream, condensed milk, and vanilla just until it holds stiff peaks (meaning it stands straight up with you dip the whisk in and then turn the whisk up).  Mix graham crackers and chocolate chunks together first, then fold into the cream mixture.

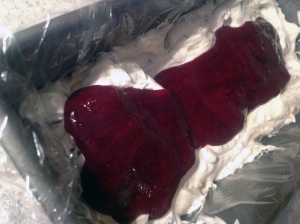
Spread half the cream mixture into a loaf pan.  Pour half the blackberry mixture on top and swirl deeply with a butter knife into the cream mixture to distribute throughout as a ripple.  Spread remaining cream mixture, top with remaining blackberry mixture, and swirl again with a knife.  Freeze until set, at least 4 hours.  When set, cover with plastic wrap and keep frozen for up to 2 weeks.

Try to hold the family back so you get some for yourself.  Or, better yet, don’t tell them unless they helped you strain the blackberries.  Enjoy!

fold

layers

readyforfreezer

scooped

Yes, yes, I’ve made blueberry scones before and they were delicious.  But I can’t resist trying new recipes and the blueberries this year were so fantastic (Emery’s Organic Blueberry Farm!)…and well, here you go.

This is based on Smitten Kitchen’s adapted North Fork scones recipe, which I have further adapted for the blueberries, to suit our taste (glaze! glaze!), and to avoid using both the food processor and the mixer.  My dishwasher (aka DH) justifiably frowns when the shrapnel from both of those hits the sink in one session.  The fortuitous discovery of one lonely, forgotten Meyer lemon in the crisper drawer made these perfection, but lemon or orange would do nicely as well.  They have a meltingly tender crumb.

blueberry-citrus-sconesBlueberry Citrus Buttermilk Scones
adapted from Smitten Kitchen
makes 12

2 3/4 cup cake flour (I used a combo of White Lily and Swan’s Down, because that’s what I had)
1/4-1/3 cup sugar (depending on how sweet your berries are)
1 tablespoon aluminum-free baking powder
1 teaspoon baking soda
1/2 teaspoon salt
6 oz very cold unsalted butter, cut into cubes
3/4 cup buttermilk, room temp
1 1/2 cups fresh blueberries, washed and dried

For glaze:

Zest of 1 Meyer lemon (or 1 lemon or 1 orange)
1 1/2 tablespoons juice from the Meyer lemon (or lemon or orange)
Confectioners’ sugar

Preheat oven to 375°.

In bowl of the the food processor, add flour, sugar, baking powder, baking soda, and salt.  Add butter and pulse until a sandy mixture (pieces will be very small and seem dry).  Add half of buttermilk and stir to moisten.  Add other half and stir.  Run food processor until dough just comes together.  Dump dough onto a floured pastry mat, board, or similar surface.  With floured hands, make a well in the center of the dough and dump in blueberries.  Gently fold/knead (taking care not to break the berries) until they are evenly distributed.  You can do this in a bowl instead if you are worried about breaking the berries.  Pat the dough into a rectangle, cut that rectangle into six squares, then each square into two triangles.  I found it easiest to do this with a dough scraper and then slid the scraper under the triangles to transfer them to the baking sheet.  My nonstick baking sheet worked great.  Bake 20-25 minutes on the middle rack until lightly browned.  Let cool completely.

Zest your citrus and juice into the same bowl.  Add enough confectioners sugar so, when mixed, it forms a thick glaze (too thin and it will run off the scones).  Glaze when the scones are cool.  Enjoy!

Kohlrabi Jalapeño Slaw

This is another one of those dishes born out of what I have on hand. Our CSA had a mini-bumper crop of kohrabi, which I had never used before, and which was described to me as “kind of like cabbage,” and is in fact a cabbage cultivar. When I hear cabbage, I think slaw.  The rest was grabbing of what was in the pantry and the certainty of honey mustard as a pretty foolproof flavor. The jalapeños from our harvest add just a bit of heat; ours were pretty mild — a nice grassy heat — so adjust the amount if yours are potent.  This would make an excellent picnic or BBQ side dish — just a bit fancier than the regular cole slaw and without the fat and calories of mayo.

Kohlrabi Jalapeño Slaw
by CSAGourmet
Serves 2 as a generous side

1 kohlrabi globe
1-2 jalapeños (depends on size and heat)
1 Tbsp country dijon mustard (I used Grey Poupon)
1 Tbsp honey
splash of rice wine vinegar
splash of low sodium soy sauce
1/4 tsp sesame oil

Trim ends and peel kohlrabi. Finely mince jalapeños. Combine all other ingredients in a bowl and whisk to combine. Taste and adjust flavor mix. Grate kohlrabi on the large holes of a box grater into the bowl, then add jalapeños.  Toss with a fork.  Enjoy!

The Best Chimichurri

Our CSA has a liberal herb section available to us every week.  It gave me the chance this week to work on tweaking chimichurri, which I’ve been obsessing over for some time now, but hadn’t perfected (to my taste anyway; I’ve never been to Argentina, so I have no expert frame of reference).  I’ve had a few tries that were way overpowering on the garlic, some not herby enough, some too oily.  I thought I had made enough mistakes to have a chance at getting the balance right this time.  When it’s done right, it’s the condiment from heaven that goes with just about every meat and meaty vegetable  — we even used this batch on top of a traditional caprese salad instead of basil, and it was a fantastic twist.

Thing is, no two chimichurri recipes seem to be the same.  And I’ve look at a lot of them.  Some with one herb, some with two, some with three, different types of vinegar, different amounts of garlic.  So, I combined pieces from a few recipes, including Emeril’s and Michael Chiarello’s (both from foodnetwork.com) to try to balance everything out and fix the problems I had before by cutting back on the raw garlic and the olive oil. It worked perfectly.  My best chimichurri yet.  We put it out on our Labor Day barbeque’s burger bar and it was great on the sirloin burgers.  Equally fantastic on the traditional flank steak, chicken, even pork.  I think I finally got it right. 🙂

It’s a more vibrant green than shown here. Not the best exposure in the late day sun.

The Best Chimichurri
by CSA Gourmet, mostly adapted from Michael Chiarello
Makes plenty

1 bunch fresh flat leaf parsley (twist off and discard the tougher stems at the bottom)
1 handful fresh cilantro (not tougher stems at the bottom)
2 Tbsp. fresh oregano (measured as full leaves, not chopped)
2 medium-large cloves garlic, peeled
1/2 c. red wine vinegar (get good stuff, there’s no cooking here)
1 tsp. salt
1/2 tsp fresh ground black pepper
1 1/2 tsp smoked parprika
3/4 c. extra virgin olive oil (again, get the good stuff)

Put all ingredients except olive oil in a food processor.  Purée.  Slowly stream in olive oil with the food processor running.  That’s it!  Drizzle over anything.  Enjoy!

I’ve always been a high heat cooking sort of girl.  Put the spurs to it, as Alton Brown says.  Fond is my middle name. 🙂  It’s a challenge for me to not sear or crisp something.

And when it comes to potatoes, I don’t experiment much.  Roast or boil&mash, that’s my repertoire.  I like a scallopped, but it always seems like work.  But, this week, when there were beautiful, huge leeks in our CSA share and Kennebec potatoes at Terhune Orchards, I challenged myself to back away from the burner and try something new.  What a lovely surprise it was!

I’m usually pretty meticulous in my tracking of where I source a recipe from, if I work from someone else’s.  But I failed to bookmark the site that gave me the basic plan for this dish — and I couldn’t retrace my steps to find it again.  So, whoever you are on the interwebs, thanks.

This dish is mild and velvety.  The leek and potato is a classic combination, and I pepped it up with a bit of fresh thyme.  The simplicity of it made the flavors of the potatoes and leeks really shine.

If you like, take the hand mixer to it and you’ll have whipped potatoes and leeks.  Or, if you want to be fancier, this takes you most of the way to potato-leek soup.  I think you’d just have to use more stock, finish with a bit of cream, and puree.

Thyme-Scented Leeks & Potatoes
by CSAGourmet
Serves 4-6

3 large leeks (white and light green parts only)
2 Tbsp butter
1-3/4 lb Kennebec potatoes, peeled (that was 4 large ones for me)
1-1/2 c. water or chicken stock
2 large sprigs fresh thyme
salt
pepper

Wash leeks well.  Slice into thin rounds.  Melt butter in heavy-bottomed Dutch oven or spaghetti pot over medium heat.  When butter is bubbling, add leeks and stir.  Watching leeks carefully so they don’t caramelize, put the lid on and cook about 5 minutes until they start to soften.  If you need to, add a bit of water to the leeks to keep them from sticking and browning.  Meanwhile, slice potatoes in half lengthwise and then into thin half moons.  When leeks are partly softened, add the potatoes, thyme sprigs, salt, and water or chicken stock.  Cover and cook over medium heat until potatoes are tender and leeks have melted into smoothness, about 20-25 minutes depending on how thinly you sliced the potatoes. Watch the water level and add a bit more if needed; when finished, the water should be all but gone.  Serve with a bit of cracked black pepper over top, discarding thyme sprigs.  Enjoy!

This is one of my favorite kind of kitchen stories.  Applying Julia Child’s “what the hell, let’s try it!” attitude, experiencing failure, and finding something fantastic that you didn’t plan at all.

This started yesterday at the farmers market.  Early apples are in and there were some cuties at the Tree-licious booth.  I didn’t write the variety name down (bad blogger!), but I bought four — green with a red blush and firm, very white, mostly tart with a wee sweetness flesh.  Good eaten out of hand, but a little too tart for my taste.  So, I thought I’d cook them.

Now, I don’t ever cook apples.  We just eat them raw.  So, I went for a recipe in the Pillsbury Bakeoff Cookbook — simple sauteed apples to go over our Sunday morning pancakes.  Except I didn’t have any lemon juice.  Hmmm…oranges in the fridge, let’s try that.  And, I felt a little butter was in order.  And there’s already a hint of cinnamon in my pancake recipe, so why not cinnamon in the apples.  And pretty soon I was completely off the recipe.  What the hell!

Lazy daisy didn’t peel the apples.  Failure #1 — the skins were off-putting.  Then, rookie overcooked the apples, so they lost their texture and crunch.  Failure #2.  And the overall look of the deflated apples was…sad.  Failure #3. We ate them anyway, they weren’t bad.  But, then the you-got-your-chocolate-in-my-peanut-butter-I-got-my-peanut-butter-on-your-chocolate moment occurred.  I eat my pancakes plain.  Yes, I said plain.  That’s the way I like them.  A bit of the thin sauce from the apples slid across the plate and tainted my pancakes.  Damn.  but I ate it anyway.  And it was fantastic.  While the apples themselves failed — the glaze they were in was a runaway success.  It tasted like Fall in liquid form.  And it reminded me of a moment from my youth — stranded in West Germany (yes, I am THAT old) where I didn’t speak the language with a boyfriend who would become an ex running in fear from food that scared the crap out of me.  I didn’t understand a place where the grocery store wurst counter was four times the size of the entire produce department.  And the breakfast at the youth guesthouses was a slice of mystery cold cut and a rock-hard Kaiser roll.  Blech.  It was then that orange marmalade saved my life by making the Kaiser roll borderline edible.  All these years later, this sauce reminded me of that, but with a warm, slightly spicy cinnamon kick.

A few adjustments and, forget about the apples as apples, spoon this glaze over the breakfast baked item of your choice. No more plain pancakes for me.

Applorange Pancake Glaze
by CSAGourmet
Makes plenty for a typical batch of pancakes

2 medium apples, mostly tart
1/2 c. packed brown sugar
2 Tbsp freshly squeezed juice from an orange
1/3 Tbsp butter
1/4 tsp salt
sprinkle cinnamon

Peel and core apples.  Dice medium.  Combine brown sugar, orange juice, butter, an salt in a saucepan over medium heat.  Stir until sugar is melted.  Add apples.  Sugar mixture should be bubbly gently.  Cook about 4 minutes until apples are tender.  Add a sprinkle of cinnamon and stir to combine. Spoon glaze somewhat sparingly over pancakes, french toast, etc.  Enjoy!

Today, the cupboard was bare.  Really bare.  I stared at the open fridge, waiting for lunch inspiration to hit. Nothing happened.  I closed it.  Like I said, bare.

Looked at the countertop.  Aha! Fresh, local tomatoes.  An onion.  I rooted through the freezer — Italian bread, frozen.  Olive oil always always always in the cupboard.  Eureka, panzanella!

Panzanella is supposed to be easy.  But it’s astonishing to me how hard foodie recipes have made it.  Ina has a panzanella recipe that takes 55 minutes.  55 minutes!  I don’t know about you, but if I’m cooking for 55 minutes, there’d better be a perfectly roasted chicken, roasted garlic mashed potatoes from scratch, and a snappy vegetable at the end of it.  Panzanella?  If it takes you more than 5 min, you are doing it wrong. And, who has time to make a 55 minute lunch (ok, BESIDES Giada, who incidentally has a bunch of panzanella recipes including, IMHO, extraneous ingredients and unnecessary procedures)? Rachael’s panzanella recipe says to soak the bread in water.  SOAK THE BREAD?  Who in their right mind would _soak_ bread for a salad?  Yuck.

This is a dish where ingredients should speak for themselves.  Have good quality ingredients and there’s no need to monkey.  You don’t even have to toast or grill the bread.  And for a quickie lunch, I find that you can smartly layer the ingredients to avoid even the need to toss.  Heck, I even skipped the basil because I couldn’t be bothered and I didn’t miss it.  Make this and serve immediately.  Simple goodness.

Sorry no picture — I got the idea to post after I’d already eaten it. 🙂

Zero Fuss Layered Lunchtime Panzanella
by CSAGourmet
serves 1

1 fresh, in-season medium tomato
1/4 of a sweet onion
1 1-1/2″ slice of fresh Italian bread (or other loaf-style bread you like)
salt
black pepper
good-quality extra virgin olive oil

Core tomato and scoop out the watery part. Cut tomato into wedges.  Cut onion into thin half moons, then cut half moons crosswise. Tear bread into bite-size pieces.  Lay bread onto plate.  Drizzle with olive oil. Layer on tomatoes.  Season tomatoes with salt and pepper. Top with onions. Enjoy!

If you want to bother with the basil, chop or chiffonade and add on top of the tomato layer.

It was love at first bite of the sweet corn tomalito from Chevy’s. I coveted it.  I ordered fajitas just to get it.  Once, the server forgot it.  I sent her back to get it.  Sure, it wasn’t perfect — I often found it dry.  And the portion was scanty.  But it tasted so good.

So when Chevy’s put out a cookbook, I bought it.

Five years (possibly more…) later, spurred by a dozen ears from my newfound fresh crack — I mean corn — dealer, I set about making it.

First, the corn.  The Pennington (NJ) Farmers Market includes Kerr’s Korn and this week, he had what he calls a “one year wonder,” a variety named “Rembrandt.” I asked what that meant and we chatted a bit about it.  I learned that the seed companies often put out a variety for only one year, usually claiming to have “lost the parents” when a farmer tries to re-order for the next season. According to Kerr’s, this invariably happens with the best varieties they’ve ever grown. Why? I asked.  That seemed to make no sense. He mused that, because the seed companies largest customers are the large “agribusiness” corn growers, they hold a great deal of sway, and if they don’t like a variety or don’t want it for the next year or find it’s too hard to grow in high volume, the seed company will often drop it. With a twinkle in his eye, as he bagged up my 13 ears (yeah, I was going to buy 6, but hey, I’m never going to taste it again!), he said, “I think they just don’t know how to grow it.”  Word.

Now, as is typical for me, I can’t make much of anything by the recipe.  Plus, the recipe calls for fresh prepared masa, and I don’t have a dealer for that — yet. So, I’ve done some work to substitute the more readily available masa harina (the recipe suggests the substitution, but is vague on how to actually do it), added chives to the mix, messed with a few measurements, and narrowed down the baking time.  Plus, some important warnings so you don’t get caught short like I almost did, and my hints to make it successful the first time.

The result is creamy but textured, corny, and just plain addictive.  This is a great potluck dish.

Sweet White Corn Pudding
adapted by CSAgourmet from “Chevy’s Fresh Mex Cookbook”
Serves 8-10 or so as a side dish

6 cups fresh white corn kernels cut from the cob* with cob scraped for milk (this was exactly 6 ears for me, but my ears were long and large, so you may want to buy 8 just to be sure).  Of course, you can use yellow or bicolor corn, you just may have to adjust the sugar if it isn’t as sweet as the white.
3/4 cup milk
1 stick unsalted butter (not softened)
1/2 cup masa harina
1/3 cup water (adjust this if your masa harina directions say to use more or less water per 1/2 cup masa harina; I used Maseca brand)
2/3 cup sugar
3/4 cup cornmeal
3/4 tsp baking powder
1 tsp salt
10 chive blades

Before you even preheat the oven, make sure you’ve got the pans you need.  This pudding bakes in a water bath, so you need a 13x9x2 pan AND a larger pan that the 13x9x2 fits in without touching sides. That pretty much means a rectangular turkey roasting pan, but I got it done with my large lasagna pan.

Now you can preheat the oven to 250 degrees. In a food processor, puree 4 cups of the corn kernels with the milk until smooth (but there will still be a bit of texture). Reserve the other two cups of corn.  Set aside the pureed corn in a large bowl (you will be mixing everything into this bowl eventually). In the processor, combine butter, masa harina, water, and sugar for about 3 minutes until smooth.

To the large bowl with the pureed corn, add the cornmeal, baking powder, and salt. Add masa harina mixture from the food processor into the large bowl.  Snip chives (1/8″ lengths) into the bowl with the reserved 2 cups of corn kernels and toss to mix. Add corn and chive mixture to the large bowl containing all the other ingredients. Mix gently, but well. Pour into 13x9x2 baking dish. The mixture should pour easily.  If it is too thick, thin with a bit of milk. Cover tightly with foil.

Open the oven and place the larger pan on the rack. Then place the 13x9x2 pan inside the larger pan. Fill larger pan with water until it is 3/4″ up the sides of the 13x9x2 pan. Gently slide into the oven.  Bake for about 1 hr 45 min until the pudding sets (original recipe says 175 degrees F on an instant read thermometer — my instant read died, so I eyeballed it).  This will give you a smooth, luscious pudding.

If you like a bit of a browned crust, I think you could pull it out a few minutes early and toss it under the broiler to brown. Don’t leave it under there too long or you’ll dry out the pudding and lose the smoothness.

Scoop out to serve. Mmmmm.  Enjoy!

Note: I actually think this pudding is better the second day.  The chives mellow and the texture gets even better. I left the pudding in the pan, covered it, and stashed it in the fridge. A quick per-portion reheat in the microwave warmed it without any loss in quality.

*Great tip I found on the interwebs — place the corn end in the hole of your Bundt or tube pan and then cut down.  Corn stays stable and the pan catches all the kernels.

Final dish.

This recipe is a great example of one of the benefits of a CSA.  Having ingredients around has increased my spontaneity.  I would never buy leeks with the intention of making a sauce.  My cooking is more…practical? rudimentary? simple?…than that (meaning that I never take it as far as making a sauce or garnishes or that sort of level of intricacy).  But, here I was making one of our “staple” dinners from an inexpensive piece of pork and I spied those leeks from this week’s CSA harvest and I knew that the pan always had delicious juices that we usually just swirl the pork in — and a thought came together and voilá — a pan sauce!  Rave reviews from DH; it elevated an already tasty dinner.

The nice thing about this recipe is I think you can play with it to suit your tastes and the cooking method will work just as well.  Use your favorite dry rub, toss some mushrooms in to roast too, or substitute shallots for the garlic.  I know I’ll be fooling around with the combination next time I make this for dinner.

Drunk Cowboy Pork with Leek & Garlic Pan Sauce
by CSAGourmet
Serves 2

1 pork rib end (boneless)
McCormick Cowboy Rub (or your favorite dry rub)
5 cloves garlic, peeled
vegetable oil (I use canola)
4 small leeks, white and tender light green parts
3/4 cup red wine (I used an inexpensive Sangiovese)

Preheat oven to 375 degrees.  In a medium oven-proof saute pan, heat about 2 tablespoons vegetable oil over medium heat (you may need more/less depending on the size of your pan; bottom should be evenly, thinly coated with oil).  Trim pork if needed.  Rub pork generously with Cowboy Rub.  When a drop of water sizzles, lay the rubbed pork top side down and sear until nicely browned, tucking the thin end under if needed to make a uniform thickness. Turn pork when first side is seared.  Add peeled garlic cloves to pan to the side of the pork.  Slide pan into the oven.  Roast pork for 25-35 minutes, depending on how thick it is, until done through.  While pork is roasting, wash and slice leeks into 1/4″ thick slices.

Pan sauce in progress.

Remove pan from oven (carefully!).  Place pork on a warmed plate and tent with tinfoil to rest.  Being careful not to touch the hot pan handle with a bare hand, now make the pan sauce over medium heat on the stovetop.  Garlic cloves should be soft; smash and break them up with a fork.  Add leeks to the juices and garlic in in the pan and stir.  Add red wine, bring to the boil, then reduce by 1/2.  The leeks will soften as the wine reduces.  There will probably be no need to adjust the seasoning; the Cowboy Rub is very flavorful.  If you like, finish the sauce by mounting it with a bit of butter; I didn’t bother because it was tasty already.  Spoon sauce and leeks over the pork and serve.  Enjoy!